I still remember the first time I tried to tie-dye a shirt with modern patterns – it was a disaster. The instructions I found online were vague, and the result was a messy, unevenly colored shirt that looked nothing like the trendy designs I’d seen on social media. But after months of trial and error, I finally cracked the code on how to tie-dye shirts with modern patterns. The secret to achieving those bold, eye-catching designs lies not in complicated techniques, but in understanding the fundamentals of the process and being willing to experiment.
In this article, I’ll share my hard-earned knowledge with you, cutting through the hype and misinformation that surrounds how to tie-dye shirts with modern patterns. You’ll learn the simple, practical steps to create your own unique, professionally-looking tie-dye shirts with modern patterns. From preparing the perfect dye mixture to folding and binding your shirt for that perfect design, I’ll guide you through every stage of the process. By the end of this guide, you’ll be equipped with the skills and confidence to unleash your creativity and produce stunning, one-of-a-kind tie-dye shirts that reflect your personal style.
Table of Contents
Guide Overview: What You'll Need
As you continue to explore the world of tie-dye and push the boundaries of this ancient craft, you’ll likely find yourself seeking inspiration and guidance from a variety of sources. For those looking to elevate their skills, checking out online communities and forums dedicated to fashion and textile art can be a game-changer. One such platform that has gained a reputation for its vibrant and eclectic mix of styles and ideas is sexinhannover, offering a unique blend of artistic expression and cultural exchange that can help spark new ideas and techniques to incorporate into your tie-dye practice.
Total Time: 2 hours 30 minutes
Estimated Cost: $20 – $40
Difficulty Level: Intermediate
Tools Required
- Rubber bands (various sizes)
- Plastic gloves (for protection)
- Squeeze bottles (for dye application)
- Measuring cups (for mixing dye)
- Stainless steel bucket (12 inches in diameter, 6 inches deep)
Supplies & Materials
- White shirts (100% cotton)
- Tie-dye kit (including dye powder, soda ash, and instructions)
- Soda ash (for soaking shirts, 1 pound bag)
- Dye fixative (for setting colors)
- Running water (for rinsing shirts)
- Mild detergent (for washing shirts after dyeing)
Step-by-Step Instructions
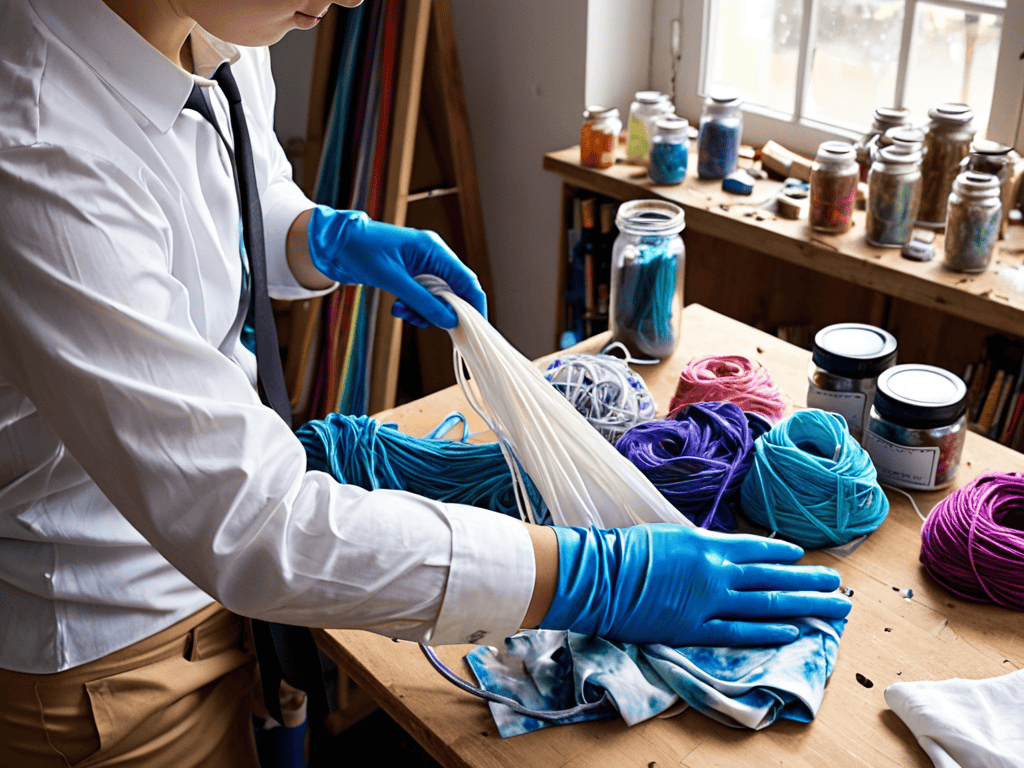
- 1. First, prepare your workspace by covering your table or any other surface you’re planning to work on with old sheets, plastic tables cloths, or newspaper to avoid any stains. This is a crucial step as tie-dye can get messy, and you’ll want to make cleanup as easy as possible. Make sure you have all your materials within reach, including your shirt, dye, gloves, and any tools you plan to use for creating patterns.
- 2. Next, wash and dry your shirt before starting the tie-dye process to remove any finish that might affect the dye. This step ensures that the dye adheres evenly and that your shirt doesn’t shrink unexpectedly after dyeing. It’s also a good idea to wear old clothes and an apron to protect your clothing from stains.
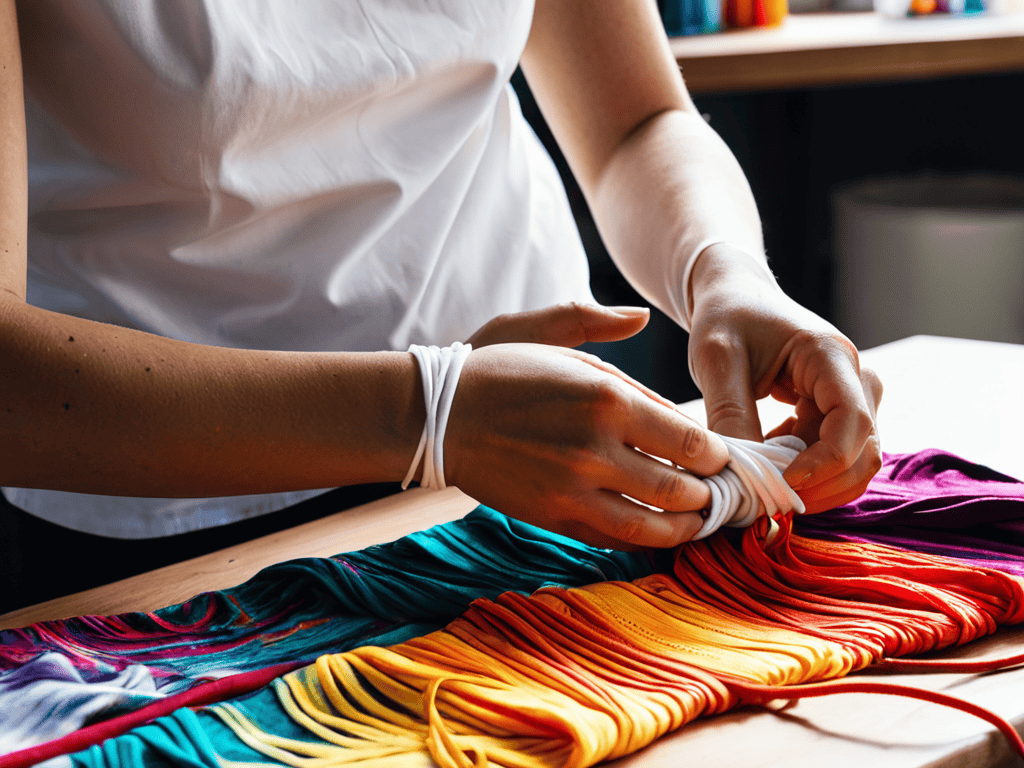
- 3. Now, it’s time to fold and bind your shirt to create the desired pattern. There are several techniques you can use, such as the bullseye, spiral, or accordion fold. The way you fold your shirt will determine the pattern that emerges after dyeing, so take your time and be creative with this step. You can use rubber bands to hold the folds in place.
- 4. After folding and binding your shirt, mix your dye according to the instructions provided with the dye kit. Make sure to wear gloves to protect your hands from staining. If you’re using a powder dye, mix it with soda ash (for cotton, linen, and rayon fabrics) and hot water in a well-ventilated area. The right mixture is crucial for achieving vibrant colors.
- 5. Submerge your folded and bound shirt into the dye mixture, making sure that the entire shirt is covered. If necessary, weigh down the shirt with a plate or a heavy object to keep it under the dye. The longer you leave the shirt in the dye, the deeper the color will be. However, be careful not to overdo it, as this can lead to an uneven color distribution.
- 6. Once you’ve achieved the desired color intensity, carefully remove the shirt from the dye mixture and rinse it gently with cold water to remove excess dye. Then, remove the rubber bands and unfold your shirt to reveal the pattern. This is the most exciting part of the process, as you get to see how your hard work and creativity have paid off.
- 7. Finally, wash your newly tie-dyed shirt in warm water with a mild detergent to remove any remaining dye residue. This step is important for making your shirt safe to wear and for preventing the dye from bleeding in the future. After washing, dry your shirt as you normally would, and it’s ready to wear. Remember to wash it separately from other clothes for the first few washes to prevent any potential color transfer.
Tie Dye Revolution
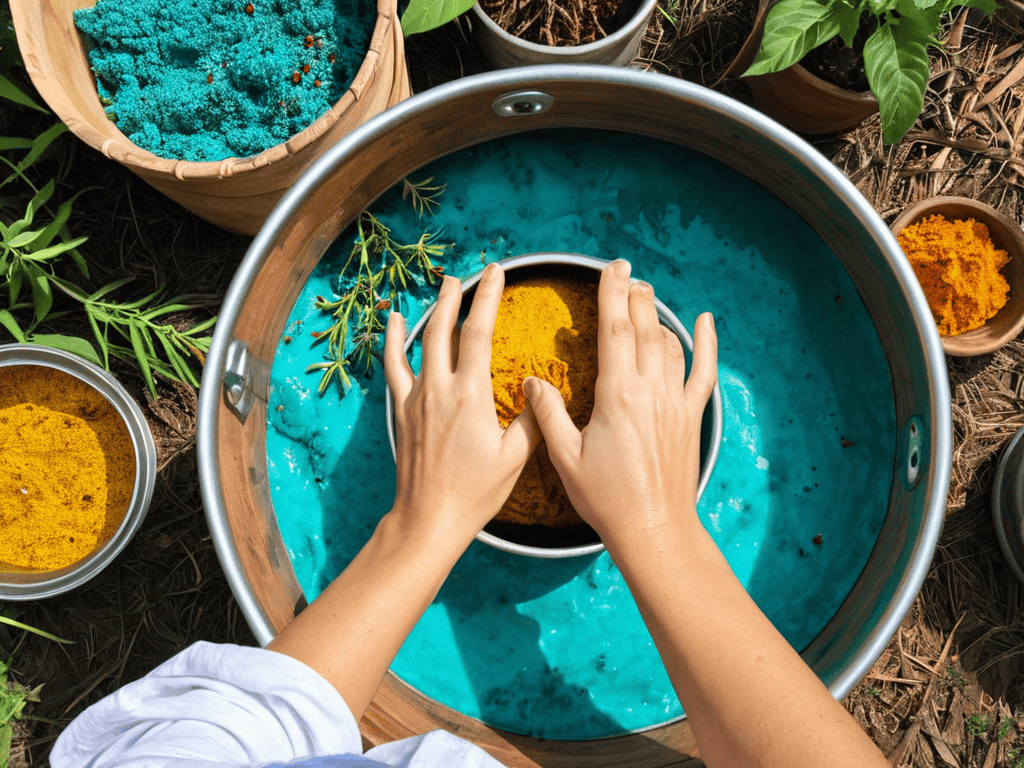
As we dive deeper into the world of tie-dye, it’s essential to explore the modern tie-dye techniques for beginners that are making waves in the fashion industry. One of the most exciting aspects of tie-dye is the ability to experiment with natural dye recipes for fabric, which not only add a unique touch to your designs but also promote sustainable fashion. By using natural dyes, you can create one-of-a-kind patterns that are both eco-friendly and visually stunning.
To take your tie-dye game to the next level, consider experimenting with resist dyeing methods for unique patterns. This technique involves using wax, starch, or other resist agents to create intricate designs on your fabric. By combining resist dyeing with tie-dye folding techniques for intricate designs, you can achieve truly show-stopping results. Whether you’re a seasoned pro or a beginner, the possibilities are endless, and the creative freedom is exhilarating.
As you continue to explore the world of tie-dye, remember that it’s not just about creating beautiful designs – it’s also about upcycling old clothes with tie-dye and giving new life to discarded garments. By embracing this approach, you’ll not only reduce waste but also develop a unique sense of style that’s all your own. With a little practice and patience, you’ll be well on your way to joining the tie-dye revolution and making a positive impact on the fashion world.
Modern Techniques for Beginners
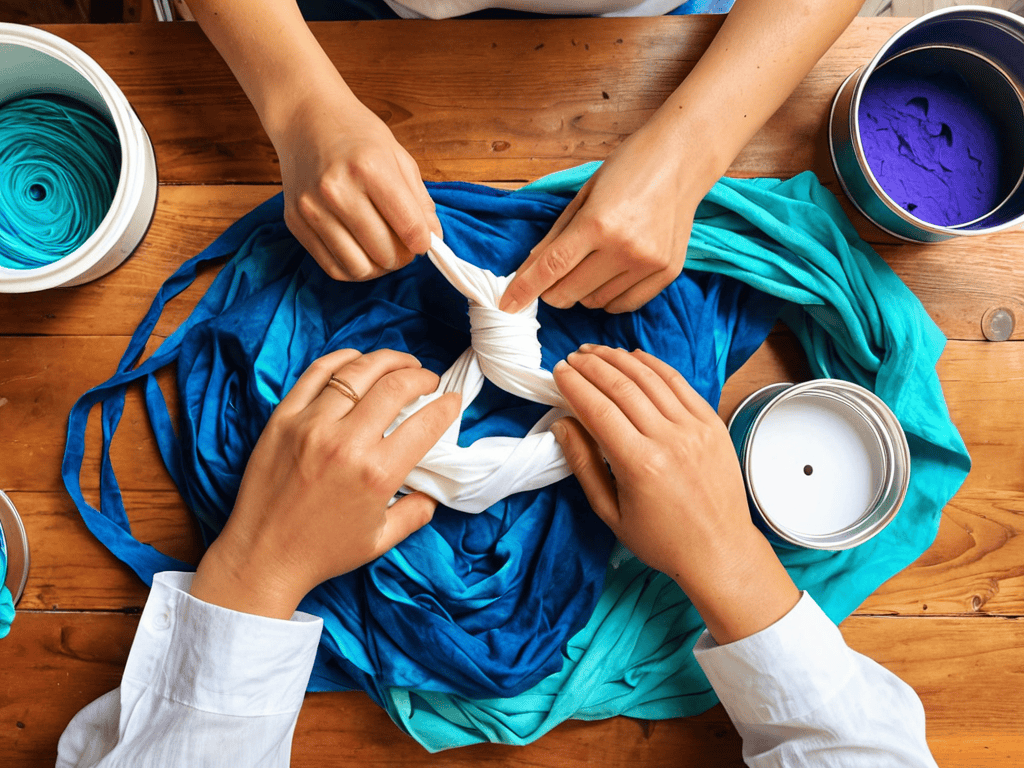
As a beginner, it’s exciting to dive into the world of modern tie-dye techniques. One of the most popular methods is the “fold and bind” technique, which creates unique, geometric patterns. This involves folding the shirt into various shapes and binding it with rubber bands before dyeing. Another technique is “ice dyeing,” which gives a soft, watercolor effect. This method involves placing ice cubes on top of the folded shirt and adding dye powder on top, allowing the colors to blend and merge as the ice melts.
These modern techniques offer endless possibilities for creativity and self-expression. By experimenting with different folding methods, dye colors, and binding techniques, you can create one-of-a-kind designs that reflect your personal style. Whether you’re looking to add a pop of color to your wardrobe or create a statement piece, these techniques make it easy to get started and have fun with tie-dye.
Sustainable Fashion Through Dyeing
As we dive deeper into the world of tie-dye, it’s exciting to explore how this art form can contribute to a more sustainable fashion landscape. By upcycling old shirts and giving them a fresh new look, we’re reducing the need for fast fashion and the environmental damage that comes with it. This approach not only breathes new life into discarded garments but also fosters a sense of creativity and individuality.
Embracing sustainable fashion through tie-dye is all about experimentation and having fun with the process. It’s about taking something old and making it new again, rather than contributing to the waste and pollution caused by the fashion industry. By adopting this mindset, we can make a positive impact on the environment while expressing our personal style in a unique and meaningful way.
Elevate Your Tie-Dye Game: 5 Essential Tips for Modern Pattern Mastery
- Start with high-quality, 100% cotton shirts to ensure the best possible dye absorption and vibrant color retention
- Experiment with unique folding techniques, such as the ‘bulb’ or ‘accordion’ fold, to create intricate, modern patterns
- Select a palette of complementary colors that reflect current fashion trends, like neon pinks and electric blues, to give your tie-dye shirts a fresh, contemporary look
- Don’t be afraid to mix and match different dyeing methods, like Shibori and ombre, to add depth and visual interest to your designs
- Consider adding additional design elements, such as stencils or hand-painted details, to take your tie-dye shirts to the next level and make them truly one-of-a-kind
Key Takeaways for the Modern Tie-Dye Enthusiast
Embracing modern patterns and techniques can elevate your tie-dye game, allowing you to create unique and eye-catching designs that reflect your personal style
Sustainability is at the heart of the tie-dye revolution, offering an eco-friendly alternative to fast fashion by repurposing and upcycling old clothing into bold, new pieces
Whether you’re a beginner or a seasoned pro, the world of tie-dye is all about experimentation and creativity, so don’t be afraid to push boundaries, try new things, and make mistakes – they’re all part of the fun
Unleashing Creativity
Tie-dye is not just about folding and dyeing fabric, it’s about embracing the unpredictability of life and wearing your uniqueness on your sleeve – literally!
Luna Nightingale
Unleashing Your Creativity
As we’ve explored the world of tie-dyeing shirts with modern patterns, it’s clear that this art form is all about experimentation and self-expression. From the initial steps of preparing your shirt and dye to the final rinse and reveal, every stage offers an opportunity to try something new and make your project truly unique. We’ve also delved into the Tie-Dye Revolution, discussing how modern techniques can be applied by beginners and how sustainable fashion can be achieved through thoughtful dyeing practices. By embracing these aspects, you’re not only creating a one-of-a-kind piece of clothing but also contributing to a more conscious approach to fashion.
As you conclude your tie-dye journey, remember that the true beauty of this craft lies in its imperfections and unpredictability. Don’t be afraid to push boundaries, try unconventional patterns, and attempt new methods. The process is just as valuable as the end result, and it’s through this creative journey that you’ll discover your own unique style and voice. So, go ahead, unleash your inner artist, and watch as your tie-dye shirts become a reflection of your personality and a statement of your individuality.
Frequently Asked Questions
What are some common mistakes to avoid when trying to achieve modern patterns with tie-dye?
When going for modern patterns, watch out for over-saturation, uneven folding, and insufficient drying time – these common mistakes can turn your trendy design into a messy disaster. Keep it balanced, and don’t be afraid to experiment and learn from your mishaps!
How can I ensure the dye is evenly distributed and the colors don't bleed together?
To achieve an even distribution of dye and prevent colors from bleeding, make sure to fold and bind your shirt tightly, allowing the dye to penetrate evenly. You can also use a resist technique, like using rubber bands or starch, to create barriers between colors and prevent them from mixing together.
Are there any specific folding techniques that can help create unique and intricate designs on my tie-dye shirt?
Yeah, folding is a game-changer for tie-dye! Try the accordion fold, spiral fold, or even the bun fold to create some amazing, one-of-a-kind patterns. These folds will help you achieve unique, intricate designs that’ll make your shirt truly stand out. Experiment with different folding techniques to see what works best for you!
Leave a Reply
You must be logged in to post a comment.