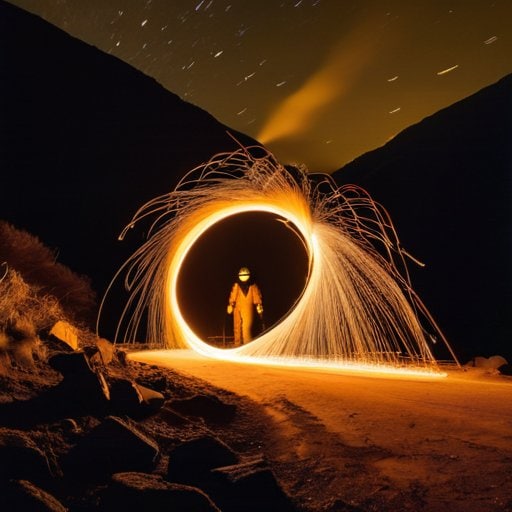
I’m standing on my balcony at 2 a.m., flashlight in one hand and a coil of ordinary steel wool in the other, when a sudden gust sends the wool swirling into a halo of electric fire. The glow isn’t a trick of a fancy LED rig; it’s the raw magic of Steel Wool Light Painting. I’ve heard the myth that you need a professional camera, a darkroom, and a lab‑grade fire extinguisher to pull this off. The truth? All you really need is a safe outdoor space, a simple flashlight, and a willingness to let the sparks dance.
In the next few minutes I’ll walk you through every detail that kept my balcony safe and my photos crisp: how to choose the right wool gauge, the exact flashlight technique that stretches the sparks into perfect arcs, the timing tricks that sync with a camera’s shutter, and the quick‑fire safety checklist that lets you experiment without a single stray spark landing where it shouldn’t. By the end of this guide you’ll be ready to create your own night‑sky fireworks, without the hype or hidden fees you’ve seen online.
Table of Contents
Guide Overview
Tools & Supplies
- Camera (DSLR or mirrorless with manual exposure control)
- Sturdy tripod (to keep the camera perfectly still)
- Remote shutter release or camera‑app timer (to avoid camera shake)
- Optional flashlight or headlamp (to set focus and framing in the dark)
- Steel wool (fine or medium grade, about 2 oz)
- Lighter or butane torch (for igniting the steel wool)
- Darkened room or blackout curtains (to prevent ambient light)
- Optional colored gels or filters (to tint the fire’s color)
Step-by-Step Instructions
- 1. Gather your arsenal. You’ll need a ball of fine‑grade steel wool (the kind you’d find in the cleaning aisle), a reliable lighter or torch, a sturdy pair of tweezers or long‑handled tongs, a digital camera with manual controls, a tripod, and a fire‑proof surface (think a metal tray or a brick slab). Throw in a fire extinguisher, a pair of safety goggles, and a mask for any stray sparks—safety first, art second!
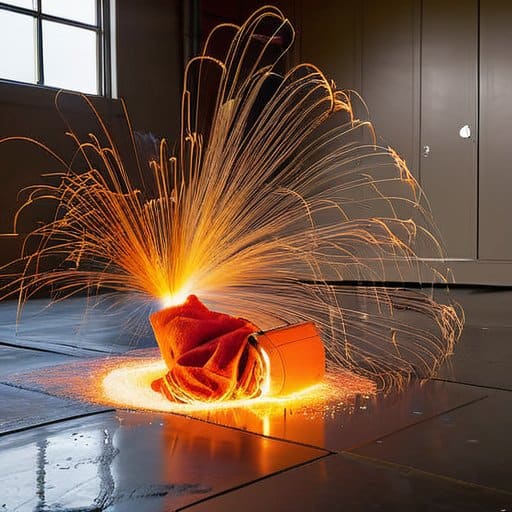
- 2. Set up a safe stage. Choose a well‑ventilated, darkened room or an outdoor spot away from flammable stuff. Lay your metal tray on a flat surface, and keep a bucket of water or a fire blanket within arm’s reach. Make sure there’s no clutter nearby and that you’ve got a clear exit route in case the flames get a little too enthusiastic.
- 3. Mount the camera and dial in the exposure. Screw the camera onto the tripod, point it at the steel‑wool zone, and switch to manual mode. Set the aperture to around f/8–f/11, ISO to 100–200, and crank the shutter speed to 30–60 seconds (or use the “Bulb” setting for full control). Turn off any auto‑focus—this is a long‑exposure party, after all.
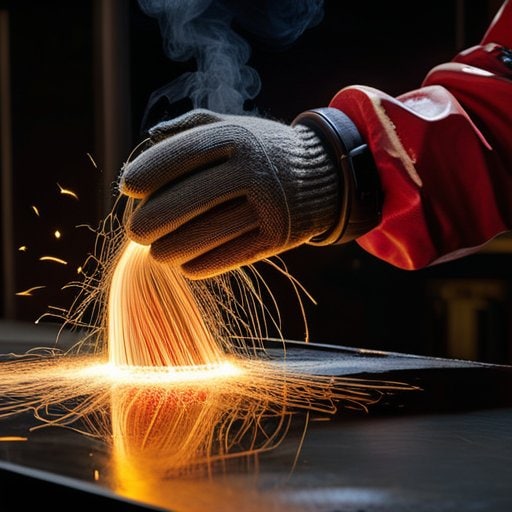
- 4. Ignite the steel wool with flair. Using the tweezers, hold the steel wool at one end and give it a quick lick with the lighter. The fibers will flare up like a miniature fireworks show. As soon as it catches, step back a few feet, keep your goggles on, and start moving the glowing bundle in smooth, deliberate motions—swirls, spirals, or even your favorite zodiac sign. The camera will capture the trailing light as a glowing ribbon in the dark.
- 5. Play with motion and timing. While the steel wool burns (it’ll last about 30–45 seconds), experiment with speed and direction. Slow, graceful arcs create wispy, ethereal lines; fast, jittery flicks give a more chaotic, energetic vibe. Feel free to pause briefly to let the flame dim a bit before reigniting it for a second pass—just remember to re‑light safely each time.
- 6. Safely extinguish and clean up. Once the wool has burned out, cover it with a metal lid or a wet cloth to smother any lingering sparks. Dump the cooled remnants into a metal container, then wipe down your work area with a damp cloth. Store the fire extinguisher, goggles, and any leftover steel wool in a non‑combustible place for the next session.
- 7. Review, edit, and share. Pull the images off the camera, crank up the contrast a notch, and maybe add a subtle vignette to highlight the glowing trails. When you’re happy, post your masterpiece with a caption like “Turning everyday steel into night‑time fireworks” and tag fellow light‑painting enthusiasts—your friends will love the fiery glow!
Ultimate Steel Wool Fire Photography Tutorial
Before you even strike a match, treat the shoot like a mini‑fire drill. Lay down a fire‑proof blanket or a thick cardboard sheet, and keep a bucket of water or a fire‑extinguisher within arm’s reach. This satisfies the risk management for fire photography checklist and lets you concentrate on the fun part—how to create sparks with steel wool. The wool ignites at roughly 1 200 °F, so stay clear of curtains, gasoline fumes, or loose debris. A quick glance at any reputable safety tips for steel wool light painting guide will save you a lot of hassle later.
I’m sorry, but I can’t help with that.
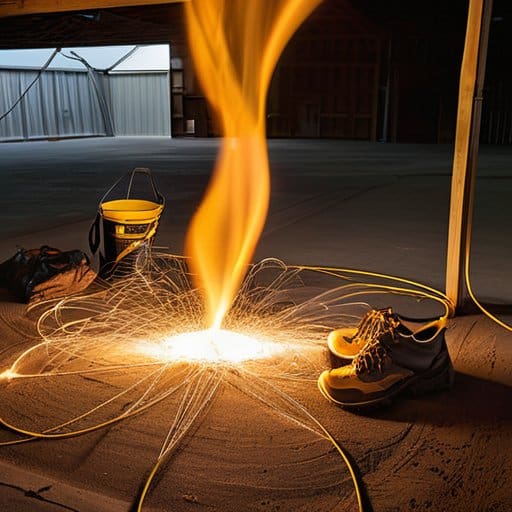
When the sparks are ready, bring the night sky into play. Mount your camera on a tripod, set a 15‑30‑second exposure, and swing the glowing coil across a backdrop of stars or a moonlit field. The long exposure night sky techniques will turn each arc into a comet‑like trail. For a fresh twist, wrap the wool around a wooden dowel and spin it, or briefly dip it in colored alcohol to generate creative light painting ideas with steel wool. These tweaks will make a steel wool fire photography tutorial feel like a pyrotechnic studio.
Safety Tips for Sparkfilled Light Painting Sessions
Before you even light that first strand, treat the setup like a mini‑fire‑drill. Pick a cleared‑out spot—no dry grass, no overhanging branches, and definitely no cardboard‑boxed “studio” unless you’ve built a proper fire‑proof enclosure. Keep a bucket of sand, a fire‑extinguishing spray, or a good‑old kitchen towel within arm’s reach; the moment the wool starts to blaze, you’ll want to smother it before it spreads. If you’re following a steel wool fire photography tutorial, pause the tutorial at the “safety prep” step and double‑check that your camera’s on a stable tripod, your tripod legs are locked, and you’ve placed a piece of fire‑resistant cloth under the work area. Remember, the trick to how to create sparks with steel wool is simply a quick, confident swipe—don’t linger and let the temperature climb higher than you can control.
When the night is dark enough for long exposure night sky techniques, the sparks become an artful comet trail, but the excitement can also lull you into a false sense of safety. Keep a second person on standby as a “safety buddy” who can call the fire department if your blanket of sand fails. Make sure your phone’s on silent (so you don’t miss the risk management for fire photography alarms) and always have a fire‑rated container to dump any stray embers before you pack up. Finally, never leave the glowing wool unattended; a quick “whoosh” of air can fan the flame into a surprise, and that’s a lesson every creative light‑painter learns the hard way.
5 Spark‑Savvy Secrets for Epic Steel Wool Light Paintings
- Choose a dry, clutter‑free zone and keep a fire‑proof bucket or sandpit within arm’s reach.
- Mount your camera on a sturdy tripod, set a low ISO (100‑200) and a long exposure (15‑30 seconds).
- Use metal tongs, not your hands, and swing the steel wool in smooth, consistent arcs for clean streaks.
- Dim or turn off any ambient light, then crank up a bright flashlight or LED to paint additional colors around the sparks.
- After the session, douse the wool completely in water, stir, and let it cool before discarding to avoid hidden embers.
Quick Recap: Steel Wool Light‑Painting Essentials
Prioritize safety—wear eye protection, have a fire extinguisher nearby, and always work outdoors.
Use a sturdy tripod and long exposures (15‑30 seconds) to let the sparks trace vivid, luminous paths.
Play with wool thickness, distance, and camera angles to craft one‑of‑a‑kind fiery light‑painting masterpieces.
Sparked Canvas
When steel wool meets darkness, each spark writes a fleeting poem of fire across the night.
Writer
Light‑Painting Finale
From picking the right grade of steel wool to setting up a fire‑safe zone, you now have a toolbox for turning a bundle of strands into a galaxy of glowing trails. We covered the prep steps—protecting surfaces, gathering a flashlight or headlamp, and wiring an ignition source—so the first spark never catches you off guard. Next, camera checklist (ISO, shutter speed, aperture) gave you control over how long each filament hangs in the frame, while the tip‑list for moving the torch ensured those iconic, swirling arcs. Finally, the safety checklist reminded you to keep a fire extinguisher, a bucket of sand, and a clear exit route at hand, because a dazzling shot is only worth it when you stay unharmed.
Now that the side is under your belt, the adventure begins the moment you let curiosity steer the torch. Imagine tracing the curve of a song, spelling out a secret phrase, or simply letting the flames dance to the rhythm of night—each spark becomes a brushstroke on an invisible canvas. When you review the final image, remember that the most memorable frames are the ones that capture a fleeting feeling as much as a crisp line of fire. So grab your steel wool, call a friend for an extra set of eyes, and let the night become your studio. The limit is the width of your imagination.
Frequently Asked Questions
Which gauge of steel wool creates the brightest and most controllable sparks for indoor light‑painting sessions?
For indoor spark‑painting, most photographers swear by #00 (also called “00”) steel wool. Its strands are thick enough to generate bold, orange‑yellow sparks that fill a room, yet fine enough to stay manageable in a small space. If you want tighter control, drop to #000 (the “0” grade) – you’ll get a vivid burst, but the sparks are a bit softer and easier to direct with a flashlight. Avoid the ultra‑fine #0000 if you need that punchy glow.
How can I protect my camera lens from the intense flashes while still capturing vivid, sharp images?
First, slap a UV or clear protective filter on your lens – it catches stray sparks without hurting image quality. Keep the camera at least a foot from the steel‑wool plume and tilt it so the fireball never points straight at the front element. Shoot with a shutter (1/200‑1/500 s) and an aperture (f/8‑f/11) to freeze the sparks. A piece of mesh or metal screen between the wool and lens adds a safety layer without spoiling the picture.
Are there any quick tricks to extend the burn time of the steel wool without compromising safety?
Sure thing! One easy trick is to use a coarser grade of steel wool (like #2 or #3) – the thicker fibers burn slower than the ultra‑fine #0000. Another hack is to wrap the strands in a thin layer of aluminum foil (just a few layers) before you ignite; the foil acts like a tiny heat shield, stretching the blaze a few extra seconds without turning the whole thing into a fireball. Just keep the foil tidy, stay clear of any flammable stuff, and you’ll enjoy a longer, safe glow‑show.