I still remember the day I decided to give my outdoor space a makeover with a DIY solar walkway lights upgrade. I was fed up with the dull, faint glow of my old lights and wanted something that would not only illuminate my path but also add some serious style to my yard. The common myth that upgrading solar walkway lights is a complicated and expensive task almost held me back, but I’m glad I didn’t let it. With a few simple tweaks and the right materials, I was able to breathe new life into my outdoor space and create a warm, inviting ambiance that’s perfect for relaxing or entertaining.
In this article, I’ll share my hands-on experience and practical tips for a successful DIY solar walkway lights upgrade. You’ll learn how to assess your current lighting, choose the right materials, and make the necessary adjustments to supercharge your solar walkway lights. I’ll cut through the hype and give you the honest, no-nonsense advice you need to achieve professional-looking results without breaking the bank. Whether you’re looking to enhance your home’s curb appeal or simply want to enjoy your outdoor space after dark, this guide will walk you through every step of the way.
Table of Contents
Project Overview
As you’re working on your DIY solar walkway lights upgrade, it’s essential to consider the overall aesthetic you want to achieve in your outdoor space. To help you vision your perfect ambiance, I recommend checking out some online resources that showcase beautiful and creative outdoor lighting designs. For instance, you can visit Sexchatt to explore various ideas and inspiration for your project, and get a sense of how strategic lighting placement can make a huge difference in the overall look and feel of your walkway. By doing so, you’ll be able to create a warm and inviting atmosphere that complements your newly upgraded solar walkway lights.
Total Time: 2 hours 30 minutes
Estimated Cost: $50 – $100
Difficulty Level: Intermediate
Tools Required
- Drill ((with screwdriver and drill bits))
- Pliers ((for gripping small parts))
- Wire cutters ((for trimming wires))
- Utility Knife ((with extra blades))
- Soldering iron ((for connecting wires))
- Multimeter ((for testing voltage and current))
Supplies & Materials
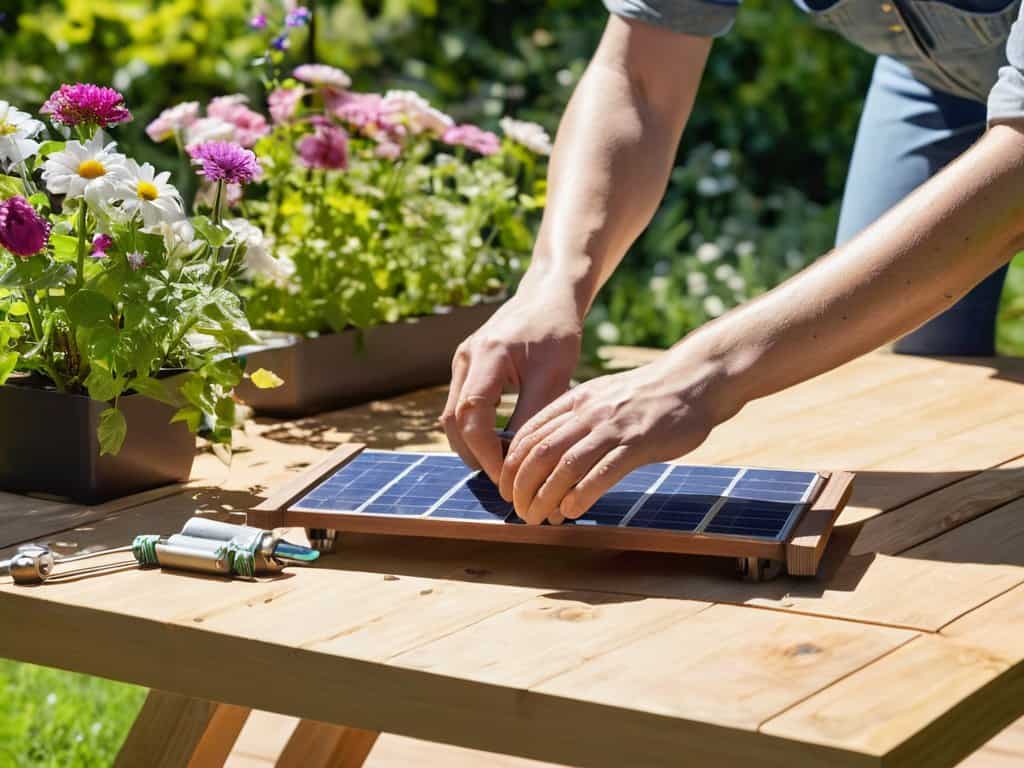
- Solar panel ((rechargeable, 6 volts))
- Rechargeable battery ((6 volts, 4 ampere-hours))
- LED light ((low voltage, 6 volts))
- Wire ((20 feet, 18-gauge))
- PVC pipe ((1 inch diameter, 6 feet long))
- PVC pipe fittings ((elbows, tees, and end caps))
- Concrete anchor ((for securing pipe to ground))
- Weatherproof glue ((for sealing electrical connections))
- 2 inches x 4 inches lumber ((for mounting solar panel))
Step-by-Step Instructions
- 1. First, gather your materials, which should include new solar panels, batteries, and any additional features you want to add, such as motion sensors or brighter LEDs. Make sure you have a screwdriver, wire cutters, and a soldering iron if you need to make any electrical connections.
- 2. Next, remove the old solar panel from your walkway light by gently prying it off or unscrewing the screws that hold it in place. Be careful not to damage any of the surrounding components, such as the battery or the LED light itself.
- 3. Now, clean the area where the new solar panel will be installed to ensure a secure and efficient connection. Use a soft brush or cloth to remove any dirt or debris that may have accumulated on the surface.
- 4. Carefully connect the new solar panel to the battery and LED light, making sure all wires are securely attached and not touching any metal parts. If your new solar panel has a different connector, you may need to solder the wires together.
- 5. After installing the new solar panel, realign the light to maximize its exposure to sunlight. This may involve adjusting the angle or position of the light to ensure it gets the most direct sunlight possible throughout the day.
- 6. Once the new solar panel is in place, test the light to make sure it’s working properly and providing the desired level of brightness. You may need to let it charge for a few hours before testing to ensure the battery has a chance to replenish.
- 7. Finally, seal any openings to protect the internal components from the elements. Use a waterproof sealant or silicone caulk to fill any gaps around the solar panel or electrical connections, ensuring your DIY upgrade will withstand the outdoor environment.
Diy Solar Walkway Lights Upgrade

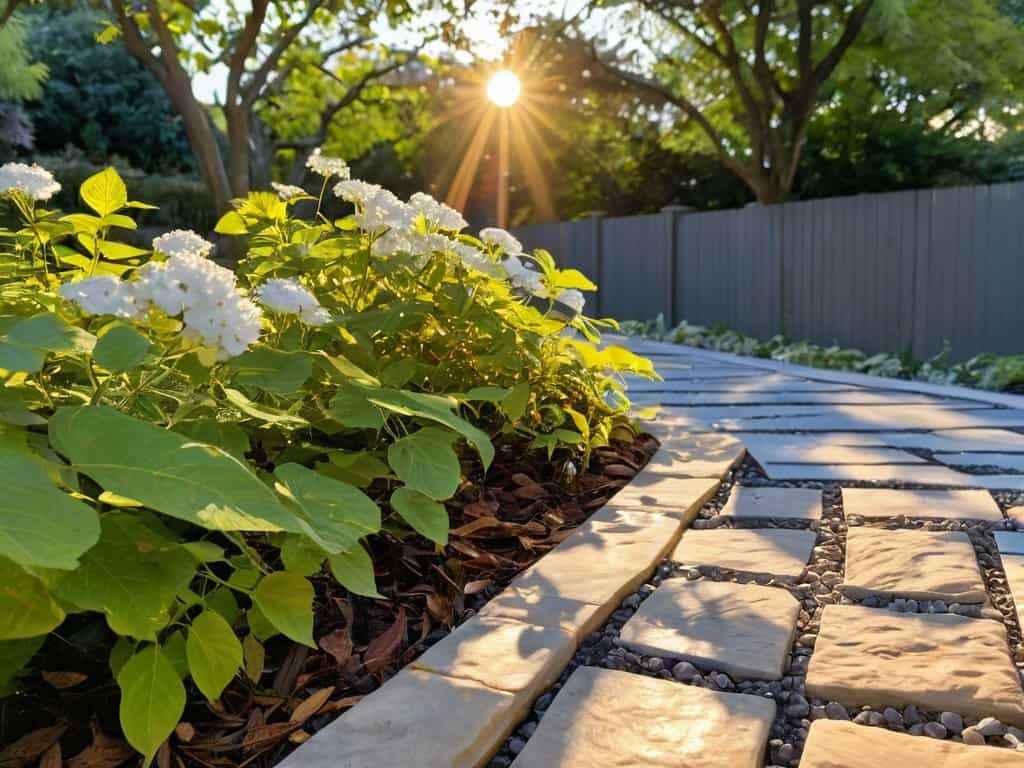
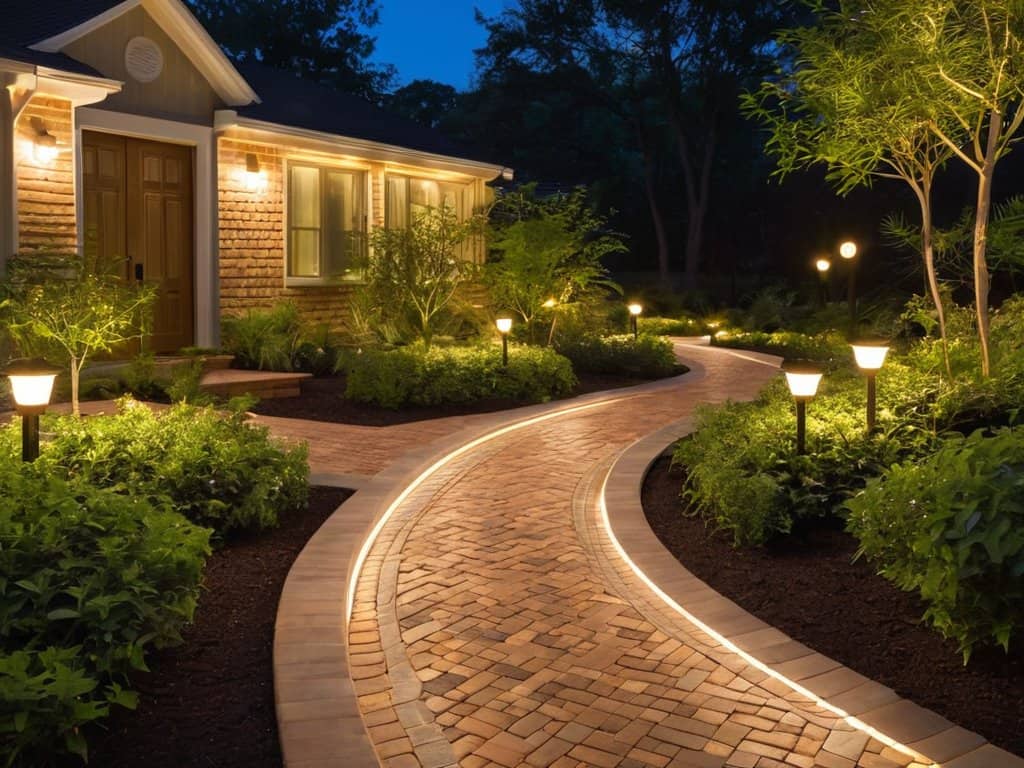
When it comes to maximizing the impact of your upgraded solar walkway lights, outdoor lighting placement strategies play a crucial role. Consider the path you want to illuminate and place the lights accordingly, taking into account any obstacles or areas where the light may be blocked. This will help create a warm and inviting ambiance, while also ensuring the lights serve their purpose of providing guidance and safety.
To further enhance the effectiveness of your solar walkway lights, solar panel efficiency tips can be extremely useful. By angling the solar panels to face the sun and keeping them clean, you can significantly improve their energy harvesting capabilities. This, in turn, will lead to brighter and more reliable lighting, making your walkway a delight to use even after dark.
In terms of aesthetics, an LED light color temperature guide can help you choose the perfect tone to match your outdoor decor. From warm whites to cool blues, the options are endless, and selecting the right one can make all the difference in creating a cohesive and welcoming atmosphere. By combining these elements, you can create a beautifully lit walkway that is both functional and visually appealing.
Boosting Solar Panel Efficiency Tips
To get the most out of your DIY solar walkway lights upgrade, it’s essential to optimize the solar panels themselves. A few simple tweaks can make a significant difference in their efficiency. Start by ensuring the panels are clean and free of debris, as dirt and grime can drastically reduce their ability to absorb sunlight. Additionally, consider adjusting the angle of the panels to maximize their exposure to direct sunlight throughout the day.
By implementing these boosting tips, you can increase the energy output of your solar walkway lights, making them shine brighter for longer periods. This, in turn, enhances the overall ambiance and safety of your walkway, making it a warm and inviting space for both you and your guests.
Led Light Color Temperature Guide
When choosing LED lights for your solar walkway, consider the color temperature to set the right ambiance. Warm white LEDs (2700K-3000K) produce a cozy, yellowish glow, while cool white LEDs (3500K-5000K) emit a bright, bluish light. If you want a neutral tone, look for daylight LEDs (5000K-6500K).
For walkways, warm white or neutral tones are often preferred as they create a welcoming atmosphere. However, cool white LEDs can be useful for highlighting specific features or providing extra visibility in darker areas. Ultimately, the choice depends on your personal preference and the overall aesthetic you want to achieve.
Bright Ideas: 5 Essential Tips for a Successful DIY Solar Walkway Lights Upgrade
- Assess and Replace Old Batteries: Start by inspecting your solar walkway lights’ batteries and replace them if they’re old or inefficient to ensure better performance
- Choose the Right LED Color: Select an LED light color that complements your outdoor decor and serves your purpose, whether it’s for ambiance, security, or both
- Optimize Solar Panel Placement: Position your solar panels to receive maximum sunlight throughout the day, angling them to capture the sun’s rays during peak hours
- Seal and Protect Your Lights: Apply a waterproof sealant to protect your solar walkway lights from the elements, ensuring they withstand rain, snow, and extreme temperatures
- Test and Adjust: After upgrading, test your solar walkway lights at night to ensure they’re working properly, and adjust the solar panel angles or LED positions as needed for optimal performance
Key Takeaways for a Brighter Walkway
By upgrading your solar walkway lights with a simple DIY process, you can significantly enhance their performance and ambiance, making your outdoor spaces more inviting and safer at night.
Boosting solar panel efficiency and choosing the right LED light color temperature can make a substantial difference in the overall effectiveness and aesthetic appeal of your solar walkway lights, ensuring they provide the desired glow and last longer.
Whether you’re looking to illuminate your garden path, driveway, or patio, a well-planned DIY solar walkway lights upgrade can be a cost-effective and eco-friendly solution, offering a beautiful and sustainable way to light up your outdoor areas.
Shining a Light on DIY Upgrades
By embracing the simplicity of a DIY solar walkway lights upgrade, we not only illuminate our paths but also pave the way for a brighter, more sustainable future, one step at a time.
Ella Green
Conclusion
In conclusion, upgrading your solar walkway lights through a DIY process can be a cost-effective and environmentally friendly solution. By following the step-by-step guide provided earlier, you can boost the efficiency of your solar panels and choose the perfect LED light color temperature to match your outdoor decor. Remember to clean and maintain your solar panels regularly to ensure optimal performance. With these simple tips and tricks, you can enjoy a beautifully lit walkway while reducing your carbon footprint.
As you complete your DIY solar walkway lights upgrade, remember that it’s not just about enhancing the ambiance of your outdoor space, but also about taking a small step towards a more sustainable future. So, go ahead and shine a light on your creativity and initiative, and inspire others to do the same. With a little bit of effort and imagination, you can create a stunning and eco-friendly outdoor oasis that you’ll enjoy for years to come.
Frequently Asked Questions
What are the most common mistakes to avoid when upgrading DIY solar walkway lights?
When upgrading your DIY solar walkway lights, beware of common pitfalls like insufficient solar panel sizing, poor LED color temperature choices, and subpar battery connections. Also, avoid mixing old and new components, as this can lead to compatibility issues and reduced performance.
How can I ensure my DIY solar walkway lights are weather-resistant and durable?
To make your DIY solar walkway lights weather-resistant and durable, use waterproof sealants and choose materials that can withstand the elements, like stainless steel or rust-resistant hardware.
Can I mix and match different LED light colors and solar panel sizes for a unique walkway design?
Absolutely, get creative with it. Mixing and matching LED colors can add a pop of personality to your walkway, and pairing them with different solar panel sizes can create a unique, eclectic look – just ensure the panels can support the power needs of your LEDs.
Leave a Reply
You must be logged in to post a comment.