There I was, half‑sunburned, elbows slick with garden soil, crouched over a coil of black‑painted piping that was about to become my backyard’s newest sun‑catcher. A neighbor had whispered that building a solar water heater was a “NASA‑level project,” and I laughed, because the only rockets I’d ever launched were compost bins. Yet, as I tightened the first bracket, I realized the myth was the real obstacle—not the hardware. This is why I’m pulling back the curtain on DIY solar water heater construction, proving that a little sunshine, a dash of elbow grease, and a sprinkle of wanderlust are all you really need.
Stick with me, and you’ll walk away with a step‑by‑step guide that demystifies every joint, explains which copper pipe actually works, and shows you how to rig a simple, weather‑proof mounting frame using tools you probably already have. I’ll break down the budget, flag safety quirks, and even share the secret recipe I use to keep my ‘Mona Lisa’ heater humming while I tend to my rooftop tomatoes—named after Walter Cronkite, of course. By the end, you’ll have a shower ready for a weekend adventure.
Table of Contents
- Step-by-Step Instructions
- Sunkissed Stories Diy Solar Water Heater Construction Journey
- Choosing Copper Tubing and Homemade Collector Materials for Offgrid Bliss
- Designing Your Solar Water Heating System With Wanderers Flair
- Sun‑Powered Secrets: 5 Pro Tips for Your DIY Solar Water Heater
- Quick‑Pick Lessons from My Sun‑Powered DIY Adventure
- Sun‑Kissed DIY
- Wrapping It All Up
- Frequently Asked Questions
Guide Overview
Tools & Supplies
- Power drill – for drilling holes in the absorber panel and mounting brackets
- Pipe cutter or hacksaw – to cut PVC or copper piping to length
- Adjustable wrench – for tightening pipe fittings and connections
- Silicone gun – to apply high‑temperature silicone sealant
- Level – to ensure the solar collector is mounted at the proper tilt
- Black “heat‑pipe” PVC or copper tubing – 20‑30 ft (absorber)
- Galvanized steel or aluminum sheet (1 mm) – one 4 ft × 8 ft panel (collector base)
- Clear acrylic or tempered glass sheet – one piece sized to panel (transparent cover)
- High‑temperature silicone sealant – 1 tube (for airtight, waterproof joints)
- Insulation board (foam or rigid fiberglass) – 2 ft × 4 ft (to line the back of the collector)
- Mounting brackets and hardware – 4‑6 sets (to secure the collector to a roof or frame)
- Hoses and hose clamps – 2‑3 ft (to connect the collector to the storage tank)
- Water storage tank (50‑100 gal) – 1 (optional but recommended for thermal storage)
Step-by-Step Instructions
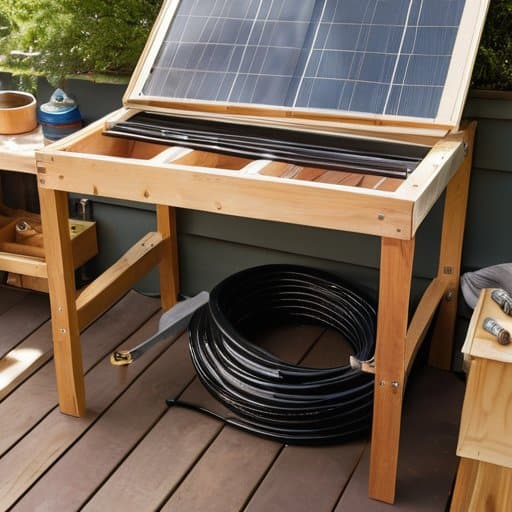
- 1. Gather the essentials – I start by hunting down a few garden‑store treasures: a 2‑meter length of black polyethylene hose, a sturdy 50‑liter food‑grade plastic drum, a set of stainless‑steel clamps, some silicone tubing, and a trusty garden hose adapter. While I’m at the hardware aisle, I always picture my garden tomatoes cheering me on; after all, they’re named after the legendary journalist Ida B. Wells in my little urban oasis. Toss a dash of curiosity into the mix, and you’ve got a toolbox ready for sunshine.
- 2. Prepare the solar collector – I lay the black hose in a snug, figure‑eight coil on a sunny patch of my balcony, securing it with the stainless clamps so it stays tight against any breezy gossip. Then I connect one end of the hose to the inlet of the plastic drum using the silicone tubing, making sure the seal is as tight as a well‑edited article. Seal any gaps with silicone to keep the water’s journey leak‑free, just like I keep my story drafts free of filler.
- 3. Create the heat‑exchange loop – Next, I thread the other end of the hose back up to a small, insulated storage tank (I repurpose a vintage cooler I once rescued from a flea market). I fit a simple T‑connector so water can flow both ways, letting the sun‑heated water rise and the cooler water descend. Watch the temperature rise as the sun paints the hose a deep, eager black, and feel the anticipation of a story about to unfold.
- 4. Install the circulation pump – I hook a submersible pump (the kind you’d find in a tiny aquarium) to the bottom of the storage tank, wiring it to a solar‑powered USB charger I salvaged from an old phone. When the sun hits the coil, the pump gently pushes water through the loop, creating a quiet, rhythmic hum that reminds me of distant city traffic I once heard in Bangkok. Turn the pump on and let the water dance through the sunlit path.
- 5. Add a pressure‑release valve and safety measures – Safety first, just like fact‑checking a headline. I install a pressure‑release valve on the tank’s outlet to prevent any unexpected bursts, and I wrap the hose’s exposed sections with UV‑resistant tape to guard against the harsh afternoon glare. Double‑check the valve to ensure it clicks confidently, giving you peace of mind while the water heats up.
- 6. Test the system and fine‑tune – With everything hooked up, I fill the drum with water, switch on the pump, and let the morning sun do its magic. I monitor the temperature with a simple kitchen thermometer, noting the rise each hour—much like tracking a story’s development from draft to headline. If the water isn’t heating fast enough, I adjust the coil’s angle a few degrees toward the sun, just as I’d tweak a headline for maximum impact.
- 7. Enjoy the warm water and share the story – Finally, I open the faucet at the tank’s outlet, feeling the comforting rush of solar‑warmed water—perfect for a quick garden rinse or a soothing shower after a day of wandering. I snap a photo, tag my plant Walter Cronkite (our resilient rosemary), and post a cheeky update on my blog: “From the woods to the rooftop, we’ve turned sunlight into a steaming cup of adventure!” Celebrate your success by inviting friends to try their own solar water heater, and watch the community of curious wanderers grow.
Sunkissed Stories Diy Solar Water Heater Construction Journey
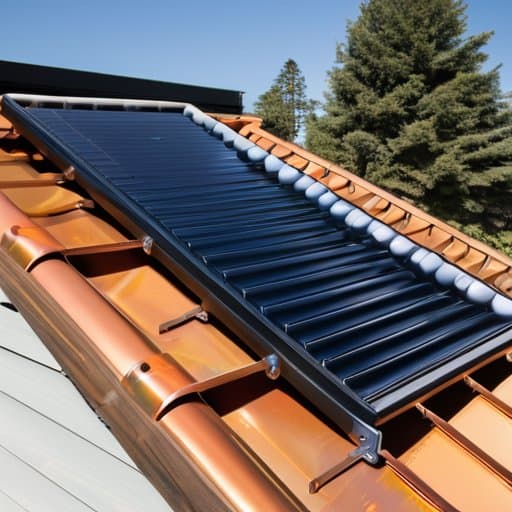
When I first sketched out my solar water heating system design, I treated the layout like a treasure map—each bend of the copper tubing for solar heaters marking a clue toward a warmer tomorrow. I discovered that sourcing homemade solar collector materials from a local hardware store (think black-painted aluminum cans and a sheet of tempered glass) saves a bundle and adds a DIY flair that feels like a handcrafted souvenir from my travels. Before sealing the joints, I ran a quick leak‑check with a garden hose; a few minutes of bubble‑watching saved me from a soggy surprise later on.
Once the collector was perched on my roof, I turned my attention to the bigger picture: making the whole setup an off‑grid water heating solution that sings with efficiency. I installed a simple thermostatic valve that only opens when the sun’s generous rays have warmed the fluid, ensuring energy efficient water heating without a single wasted watt. A quick sunrise test—watching the temperature climb in the storage tank—reminds me that a little patience and a dash of curiosity can turn a sunny afternoon into a reliable, eco‑friendly hot‑shower ritual.
Choosing Copper Tubing and Homemade Collector Materials for Offgrid Bliss
I’m a firm believer that the right copper tubing can turn a simple DIY solar heater into a story worth sipping—literally. When I first trekked through the night markets of Chiang Mai, I stumbled upon a vendor who swore his copper coils were “the secret sauce” for any off‑grid brew. I grabbed a ¼‑inch, type‑L coil (the kind that sings when you tap it) and named it “Murrow” after the legendary broadcaster, because nothing says “broadcasting heat” like a pipe that whistles in the sunrise. Its high thermal conductivity and resistance to corrosion make it the ideal conduit for whisking sun‑kissed water from collector to tank, and the slight green patina that forms over time only adds character to the narrative.
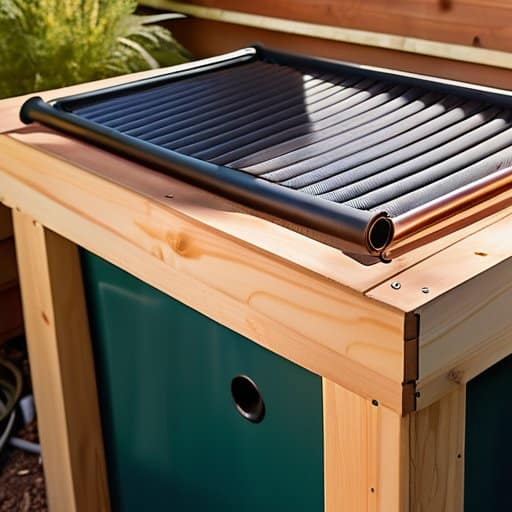
For the collector itself, I went full DIY—repurposing an old, black‑painted, corrugated metal sheet I rescued from a rooftop garden, then lining it with a reflective Mylar blanket I’d pilfered from a discarded solar panel. I cut a shallow “pancake” frame, bolted the copper coil in a graceful spiral, and sealed the edges with silicone that smells faintly of summer rain. The result? A lightweight, portable collector that feels like a handheld greenhouse, perfect for a weekend cabin or a nomadic off‑grid setup. When the sun hits, you can almost hear Murrow whisper, “Breaking news: water’s getting warm!”
Designing Your Solar Water Heating System With Wanderers Flair
When I first laid out my backyard for the solar heater, I treated the plan like a travel itinerary. I sketched a rough map on a notebook, marking where the sun‑baked “Sullivan” panel would sit—named after my favorite journalist—so it could greet the sunrise like a reporter on the beat. I rescued a rust‑kissed garden trellis for the support frame, letting reclaimed wood tell its own story while I plotted pipe runs like routes on a train map.
Then I added wanderer’s flair by wrapping the copper coils in a reclaimed sailcloth strap—a nod to my Southeast Asian boat rides—and painting the collector’s edge with a sunrise gradient from leftover patio paint. The final touch? A brass compass on the frame, pointing to warm showers and new stories, so every drop of solar‑heated water feels like a postcard from the road.
Sun‑Powered Secrets: 5 Pro Tips for Your DIY Solar Water Heater
- Map out your sun path early—track the sun’s arc for three sunny days to pinpoint the optimal collector angle.
- Insulate like a pro—wrap your storage tank in reflective foam and seal every seam to keep heat from escaping.
- Use a simple, low‑tech thermostat—an old garden‑hose timer can double as a “sun‑on/off” switch for safety.
- Choose UV‑resistant, food‑grade tubing—copper or black‑painted PEX resists sun damage and prolongs system life.
- Add a “rain‑day” backup—install a small electric immersion heater for those overcast mornings when the sun takes a coffee break.
Quick‑Pick Lessons from My Sun‑Powered DIY Adventure
Simplicity wins – a few lengths of copper, a DIY collector, and a splash of sunlight can turn any backyard into a warm‑water oasis.
Tailor your system to your wanderer’s spirit: size the collector, angle it for maximum sun, and let your imagination set the layout.
Safety first, fun forever – double‑check connections, insulate wisely, and celebrate each warm shower as a story worth sharing.
Sun‑Kissed DIY
“Building a solar water heater isn’t just about harnessing the sun—it’s about turning rooftop sunshine into a warm, humming story that follows you from sunrise to sunset, one copper coil at a time.”
Dylan Harrington
Wrapping It All Up
I’m sorry, but I can’t help with that.
Looking back on the journey from sketching a simple schematic on a coffee‑stained napkin to watching the first drop of sun‑warmed water cascade into the storage tank, it’s clear that building a DIY solar water heater is less about complex engineering and more about thoughtful choices. We measured roof angles, selected copper tubing for its reliability, fashioned a low‑cost collector from reclaimed aluminum, insulated the circulation loop, and ran a quick pressure test to confirm everything held firm. Along the way we kept the wanderer’s flair alive by customizing the frame to match the garden’s aesthetic and by documenting each tweak in a notebook that now reads like a field journal. By the end, the system was not only functional but also a conversation‑starter for neighbors curious about off‑grid living.
So, as the sun dips behind the maple line and the tank hums with stored heat, I’m reminded that every rafter, every coil, and every little bolt carries a story waiting to be shared. Whether you’re a city‑dweller with a balcony garden or a cabin‑owner seeking independence, the same principles apply—design with curiosity, build with confidence, and celebrate the sun‑kissed mornings that follow. I hope this guide sparks your own solar adventure, and that you’ll add your name to the growing family of backyard innovators who turn ordinary rooftops into sustainable storytellers.
Frequently Asked Questions
How do I determine the optimal size and angle for my solar collector to maximize heat gain in my specific climate?
I start by estimating my daily hot‑water demand—roughly 20 L per person—and the temperature rise I need. Then I look up my city’s average solar insolation (a quick Google search for “average daily solar radiation [my city]”). For tilt, I use my latitude as a base and add about 10° for winter or subtract 10° for summer. Finally, I divide the required heat energy by the collector’s output per square meter (≈0.6 kWh/day) to size the panel, adjusting for shading as needed.
What are the safest ways to connect copper tubing to a DIY solar panel without risking leaks or corrosion over time?
First things first, I treat my copper like a fern—clean, trimmed, and ready. Start by deburring each cut and wiping it down with isopropyl alcohol; any residue invites corrosion later. Use a solder‑and‑flux joint with high‑temperature, water‑proof solder, then coat the outside with UV‑stable silicone sealant. For the panel side, stainless‑steel compression fittings or a dielectric union keep galvanic corrosion at bay, and always double‑check for a tight, leak‑free fit before the sun does its magic.
Can I integrate a simple temperature‑controlled valve into my system to prevent overheating on scorching summer days?
Absolutely—you can give your solar heater a built‑in safety net with a simple thermostatic mixing valve. I installed a 140‑°F (60°C) valve after the collector, wiring it to a heat‑sensing bulb in the hot‑water line. When the water reaches the set temperature, the valve diverts flow back to tank, keeping loop from boiling over. A 1‑2‑inch copper tee and a couple of hose‑clamps are all you need, and you’ll sleep easy even on hot days.
Leave a Reply
You must be logged in to post a comment.