I still remember the first time I walked into a downtown loft that had just been stripped down to its bones. The floor was a patchwork of reclaimed planks, the ceiling a naked grid of exposed ducts, and—right across from the industrial kitchen—was a wall swathed in fluted wood wall paneling. The faint scent of sawdust mingled with coffee, and the rhythmic shadow lines from the grooves seemed to pull the room together, turning a raw space into a quiet gallery. No glossy veneer, no pretentious lighting tricks—just the honest, tactile rhythm of wood that whispered, “I’ve been here, I’ve survived.”
If you’re tired of glossy, overpriced wall coverings that promise drama but deliver cheap plaster, I’ll walk you through the real reasons why fluted wood wall paneling works, how to pick the right grain and spacing, and what pitfalls to dodge when you install it yourself. Expect no fluff—just the hands‑on tips and honest cost breakdown that will let you give your walls character without breaking the bank. I’ll also reveal cheap sourcing hacks and a simple upkeep checklist so the your grain stays vibrant for years.
Table of Contents
- Fluted Wood Wall Paneling Crafting Depth Drama
- Installation Secrets Fluted Paneling Tips for Flawless Fit
- Midcentury Modern Inspiration Styling Fluted Walls With Retro Flair
- Fluted Paneling vs Wainscoting the Surprising Showdown
- Acoustic Edge How Wood Panels Quiet Your Space
- Maintenance Mastery Preserving Your Custom Fluted Panels for Decades
- 5 Insider Hacks for Fluted Wood Wall Perfection
- Quick Hits: Fluted Wood Paneling Essentials
- The Grain’s Quiet Drama
- Wrapping It All Up
- Frequently Asked Questions
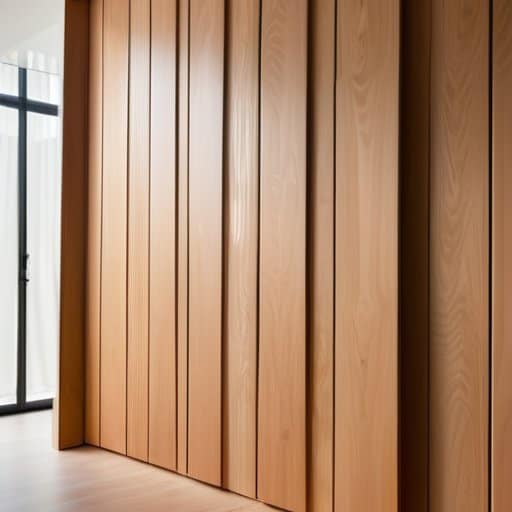
Fluted Wood Wall Paneling Crafting Depth Drama

When a room needs a visual push‑pull, nothing creates that sculptural feel quite like a series of narrow, vertical ribs. The shallow grooves catch light at every angle, turning a flat wall into a subtle canyon of shadows. Even before the first nail goes in, the fluted paneling installation tips—like spacing the studs a few inches wider than usual and using a flexible adhesive—ensure the boards sit flush and stay level. And because the ridges act like natural baffles, you’ll notice a modest improvement in room acoustics, a quiet bonus for open‑plan living spaces.
If you’re leaning toward a retro vibe, pair the ribs with tapered legs, brass hardware, and a muted walnut finish—classic mid‑century modern interior design ideas that let the panels become the room’s main stage. When debating fluted paneling vs wainscoting, remember that the former stretches from floor to ceiling, amplifying verticality, whereas wainscoting stops at chair‑rail height and offers a more traditional frame. Finally, a quick routine of dusting the crevices and applying a light wax every six months keeps the wood breathing and looking fresh, so maintenance never feels like a chore.
Installation Secrets Fluted Paneling Tips for Flawless Fit
Once your panels are up and the room already humming with a softer acoustic vibe, the next step is to fine‑tune the visual rhythm with trims, lighting, and occasional accent pieces. For anyone who prefers a hands‑on approach, I’ve found a surprisingly thorough step‑by‑step guide that walks you through everything from measuring the exact groove depth to selecting the right finish for a lasting sheen, and it even includes a downloadable layout planner that helped me keep my cuts tight and my seams invisible—something I wish I’d discovered earlier. If you’re curious to see a real‑world example of a mid‑century lounge transformed by fluted wood magic, the gallery section of sextreffen steiermark showcases a few before‑and‑after shots that illustrate how a simple change can make a room feel architecturally richer. Trust me, a few minutes spent on that page can save you a weekend of guesswork and give your project that professional polish.
Start by laying out a template on a sheet of paper; this catches any irregularities before the first board meets the wall. Snap a level line at the height for the first strip, then set a ¼‑inch reveal for expansion. When nailing, a pneumatic nailer works faster than a hammer, but always pre‑drill a pilot hole to prevent the flutes from splitting. Double‑check each board sits flush with its neighbor before moving on.
Next, align the grain direction of each panel with the room’s flow; this subtle cue ties the installation to the architecture. Use wooden spacers between boards to keep the reveal consistent, then apply a bead of flexible caulk at every joint for a waterproof seal. Once all strips are in place, sand the edges lightly and finish with a clear coat for a seamless transition that feels custom‑built.
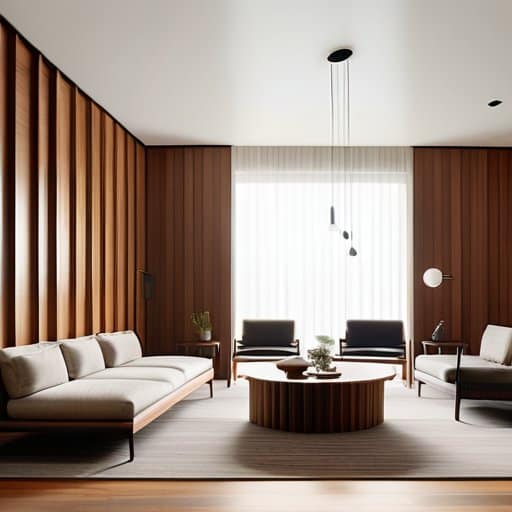
Midcentury Modern Inspiration Styling Fluted Walls With Retro Flair
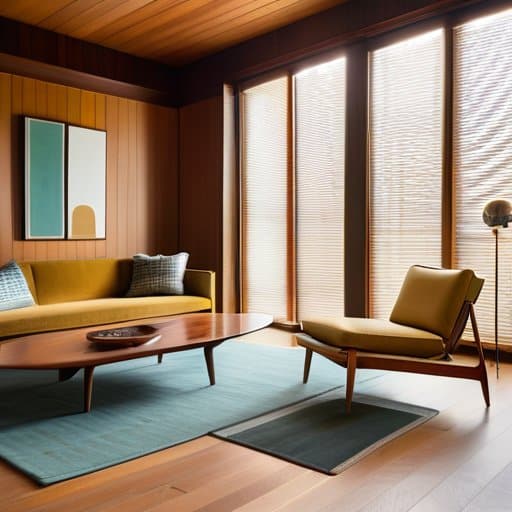
When a fluted wall meets the clean lines of mid‑century modern aesthetic, the result feels both sculptural and warmly nostalgic. Think teak trim, tapered legs, and a muted mustard or teal backdrop that lets the vertical ridges breathe. Pair the paneling with low‑profile sofas and an iconic Eames lounge chair, turning the wood’s rhythm into part of the room’s architecture. The subtle shadow play along each groove echoes the era’s love for geometry without overwhelming the space.
To push the retro flair, hang a sunburst clock or a set of atomic‑age sconces beside the flutes, letting light cascade into the channels. A walnut coffee table with tapered legs mirrors the panel’s verticality, while a shag rug in burnt‑orange adds texture without competing. Finish with a handful of potted fiddle‑leaf figs, and the space feels like a curated 1950s lounge updated for today.
Fluted Paneling vs Wainscoting the Surprising Showdown
At first glance, the showdown fluted paneling vs wainscoting feels like a design‑duel straight out of a showroom. While wainscoting offers a classic half‑wall shield that whispers heritage, fluted panels stretch from floor to ceiling, carving vertical rhythm into a room’s silhouette. The extra surface area isn’t just for show; it delivers acoustic benefits of wood paneling, softening echoes in open‑plan living spaces. For those chasing a sleek mid‑century modern interior design ideas look, a row of custom fluted wall panels can echo the era’s love for linear geometry without the visual heaviness of beadboard.
Installation is where the rubber meets the nail, and the two systems diverge sharply. A wainscoting project usually stops at chair‑rail height, meaning you can skip the ceiling‑to‑floor prep, but you’ll also miss the chance to hide wiring or ductwork behind the panels. In contrast, fluted paneling installation tips stress careful measurement of each groove to avoid gaps that can ruin the visual flow. Once up, upkeep is surprisingly simple: a regular dust‑off and a light coat of satin polyurethane keep the surface looking fresh, aligning with the low‑maintenance vibe of contemporary interiors.
Acoustic Edge How Wood Panels Quiet Your Space
One of the quietest perks of fluted wood paneling is its inherent ability to tame a room’s reverberation. The solid grain and subtle hollows act like a soft sponge for mid‑range frequencies, turning a lively open‑plan loft into a space where conversation stays intimate. In other words, the panels provide natural sound dampening without the sterile look of acoustic foam. Plus, the warm timber tone adds visual comfort that complements the acoustic benefit.
To maximize that acoustic edge, pay attention to how the panels are mounted. Leaving a thin air gap between the wall and the flutes creates a miniature resonance chamber, while staggering the seams prevents unwanted echo paths. Pairing the wood with a thin layer of acoustic felt behind it can boost performance without sacrificing style, turning your hallway into a quiet sanctuary that feels both sleek and truly serene.
Maintenance Mastery Preserving Your Custom Fluted Panels for Decades
Keep your fluted walls looking fresh with a light dust‑off each week. A soft microfiber cloth or a vacuum fitted with a brush attachment will glide along the grooves without dislodging any debris. When a deeper clean is needed, dampen a cloth with merely a splash of pH‑balanced wood soap, wring it out, and wipe along the grain. Gentle vacuuming protects the profile while removing hidden dust.
Every few years, give the panels a refresh by lightly sanding any rough spots and wiping away residue. Apply a coat of natural oil or a water‑based polyurethane, allowing it to soak for the time before buffing to a sheen. This seasonal oiling not only revives the wood’s warmth but also creates a protective barrier against humidity swings, extending the life of your flutes. Schedule the routine during a dry weekend for best results.
5 Insider Hacks for Fluted Wood Wall Perfection
- Map out your panel layout on graph paper first—visualize spacing, grain direction, and any focal points before you lift a single board.
- Use a flexible back‑boned cutter for clean, straight cuts; it respects the delicate flutes and prevents chipping the subtle ridges.
- Apply a water‑based, low‑odor stain in a well‑ventilated room; it lets the wood’s natural grain breathe while keeping indoor air fresh.
- Install a thin, felt‑backed acoustic underlayment behind the panels to boost sound dampening without sacrificing the sleek look.
- Finish with a UV‑resistant clear coat and schedule a gentle cleaning routine every six months to keep the wood glowing for decades.
Quick Hits: Fluted Wood Paneling Essentials
Fluted panels instantly add depth, shadow play, and timeless texture to any wall.
Precise installation—respect grain direction, maintain even spacing, and finish cleanly—for a showroom‑ready result.
Beyond looks, fluted wood softens sound and, with simple upkeep, stays stunning for years.
The Grain’s Quiet Drama
“A wall of fluted wood isn’t just a surface—it’s a rhythm of shadows and light that turns a room into a living, breathing story.”
Writer
Wrapping It All Up
From the moment you step into a room lined with fluted wood, the subtle ridges instantly draw the eye and create a sense of architectural depth that flat walls simply cannot match. We’ve walked through the practical side—how a careful prep, precise measuring, and the right adhesive can turn a weekend DIY into a flawless fit—then we leapt into style, showing how a mid‑century modern palette can turn those grooves into a retro runway. Finally, we proved that fluted panels not only outperform traditional wainscoting in visual impact but also muffle unwanted noise and, with proper sealing, stay beautiful for decades.
Imagine the feeling of stepping back into your own living room and watching the sun’s rays chase along those elegant channels, each groove echoing a story you’ve crafted yourself. Whether you’re renovating a crisp loft, a cozy cottage, or a bustling home office, fluted wood invites you to personalize texture, acoustics, and heritage in one affordable package. So the next time you glance at a blank wall, picture the rhythmic shadows, the subtle resonance, and the timeless charm waiting to be revealed. Take the plunge, trust the installation tips we’ve shared, and let your space become a living gallery of depth, drama, and enduring style. Your walls will thank you, and your guests will linger longer, savoring every contour of your space.
Frequently Asked Questions
How much does fluted wood paneling typically cost, and are there budget‑friendly options that still look high‑end?
Fluted wood paneling typically runs $30–$80 per square foot for solid hardwood, but you can pull off a luxe look for as little as $12–$25 with high‑grade MDF or veneer panels that you paint or stain yourself. Look for pre‑finished, tongue‑and‑groove kits, shop surplus lumber yards, or order off‑cut sheets—these tricks keep the price down while still giving you that deep, shadow‑play you love. A little DIY prep can make a high‑end finish feel effortless.
Can I install fluted wood panels myself, or should I hire a professional to avoid gaps and alignment issues?
If you’re comfortable with a little DIY drama, installing fluted panels yourself can be rewarding, but the devil’s in the detail. Precise measuring, a good nail gun, and a steady hand are essential; even a half‑inch mis‑alignment shows up in the grooves. For a flawless finish—especially on larger walls or uneven studs—a seasoned carpenter will save you time and headaches. In short, hobbyists can tackle simple jobs, but professionals guarantee gap‑free elegance and lasting beauty.
What are the best ways to integrate lighting and accessories with fluted panels to highlight their texture without overwhelming the room?
Start with soft, directional lighting—think adjustable recessed spotlights or a slim track that tilts toward the panel’s ridges. A warm 2700‑3000 K hue lets the wood’s grain breathe, while a dimmer keeps the glow subtle. Pair that with a few low‑profile sconces or a single pendant to avoid clutter. Finally, choose a few textured accessories—think a linen rug or a sculptural vase—to echo the panel’s rhythm without competing for attention in the overall design today.
Leave a Reply
You must be logged in to post a comment.